Table of Contents
The Mac trackpad is an amazing technological device that can be used for more than just clicking and pointing. With the correct information, your Mac trackpad may work as a strong ally to increase productivity and improve user experience.
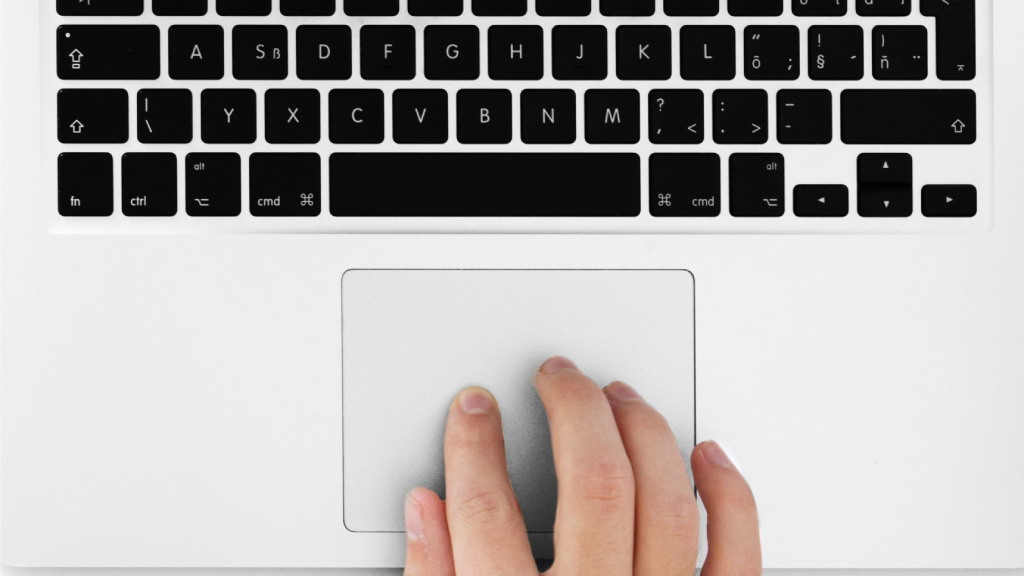
Rotating, Zooming, Scrolling, and Clicking
There’s no need to really press hard on the Mac trackpad when you can click left with a single finger tap or right with two fingers. It’s not as clear to tap with three fingers. To read a dictionary definition for a term, place your cursor over it in virtually any application and tap with three fingers.
Using two fingers to move left, right, up, or down on your touchpad makes scrolling easy and straightforward.
To zoom in or out, use the pinch-to-zoom gesture in a web browser or another document. Double-tap with two fingers to do a “smart zoom” in order to zoom in or out on the content. For instance, this post will automatically zoom in such that the main content column covers the browser window when we double-tap with two fingers on it.
Using two fingers on your trackpad, rotate the open document by rotating them in a circle, exactly as when turning a knob. While it won’t function on a web browser, this will function in programs that are suitable for it. When you apply this gesture in iPhoto, for instance, the current photo gets rotated.
Mac Trackpad Multi-Touch Gestures
Apple’s trackpad is made using capacitive touch technology, which senses the electrical charge your fingertips make. Numerous Multi-Touch gestures are pre-installed on the Mac trackpad and are ready for usage right away. Gestures using two or more fingers that your Mac trackpad recognizes are called Multi-Touch gestures. They are customizable; in the event that you have previously done so, their functionality will change.
The following basic Multi-Touch gestures are pre-installed on your Mac:
- To navigate between pages, place two fingers on the touchpad and swipe left or right. This motion, for instance, advances or reverses a page in Chrome or Safari.
- Using four fingers on the trackpad, swipe left or right to navigate between Spaces (several desktops) or full-screen apps. You can access all these Spaces, windows, and full-screen programs by sliding up with four fingers on the touchpad. As a result, the Mission Control screen appears. To exit this screen, you may alternatively swipe down with four fingers.
- Use a pinch gesture with your thumb and three fingers to access Launchpad, which lets you launch and display icons for all of your installed apps.
- Try doing a “reverse pinch” to view your desktop: Instead of squeezing your thumb and three other fingers together, spread them out on the trackpad. Your desktop will become visible when the windows on your screen slide aside. Pinch your fingers together rather than spreading them apart to regain your windows.
- To open the Notification Center, use two fingers on the right side of the trackpad and swipe them left. This is where system alerts from apps that generate them, such as email clients, instant chat software, Twitter apps, and others, will show up.
Viewing and Customizing Gestures
Nearly all of these gestures may be customized by Apple; you can switch up which gestures go with specific actions and turn off those that you don’t wish to utilize.
Click the Apple symbol in the menu bar at the top of the screen, select System Preferences, and then Trackpad to open this pane. Scroll down the left sidebar, and select the Point & Click tab. This section contains settings. Hold your cursor over a gesture to view a brief video explaining how it works.
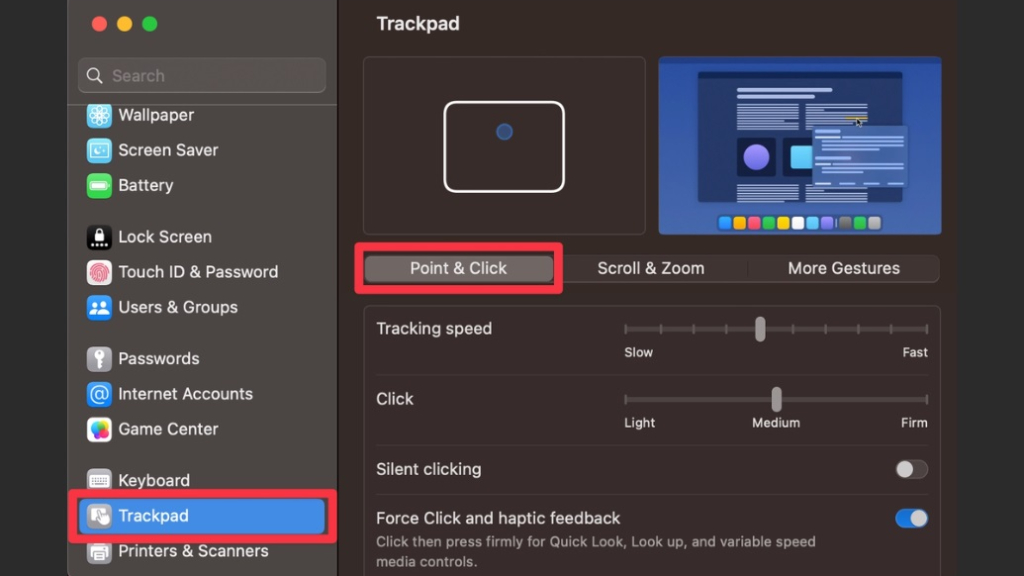
Some of the gestures available here can be activated, but they are not enabled by default. For instance, you may use one motion to move windows around the screen by pressing and holding down the trackpad with three fingers.
Let’s look at how to set up your Mac trackpad gestures so they function flawlessly on your device.
1. Modify the Tracking Speed
A slider with the name “Tracking speed” will be shown. You may change the tracking speed by dragging the slider to suit your needs. Acceleration and deceleration are indicated by sliding the slider to the right and left, respectively.
You’ll see a preview of the window’s cursor speed as you adjust the slider. Select a place where you feel convenient.
2. Turn On Silent Clicking
On a Mac, toggle the quiet clicking option to enable silent clicking. You should be able to click the trackpad without producing an audible clicking sound after turning on quiet clicking.
3. Activate Haptic Feedback and Force Click
- To activate the Force Click and haptic feedback capabilities on a Mac, turn them on and off.
- Depending on the type of your trackpad, you can use two fingers to click or apply pressure with one finger to accomplish a Force Click after haptic feedback and Force Click have been activated.
- To mimic an actual click, the haptic feedback will provide a faint vibration or tactile reaction.
4. Gesture Customization for Look Up and Data Detectors
Locate the Lookup & Data Detectors option 4 to modify the Look Up & Data Detectors gesture on a Mac.
Next, to Look up & Data Detectors, select the dropdown menu or the corresponding settings button. A list of possible movements or actions for this choice will appear.
From the list, select the required gesture, or, if one is available, select a custom motion.
5. Modify the Secondary Click
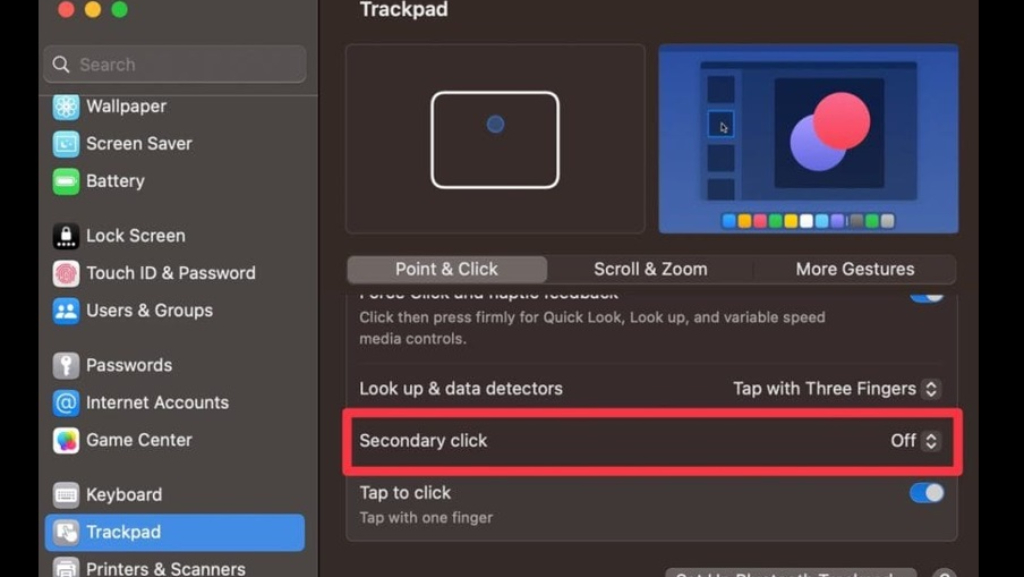
- Look for the Secondary click option in order to personalize the Mac’s secondary click, commonly referred to as right-click.
- Next to the Secondary click, click the corresponding options button or the drop-down menu.
- A selection of alternatives for the secondary click will appear. Typically, the alternatives are Click in the bottom-left, Click in the bottom-right, or Click or tap with two fingers.
- Select the one that you find to be the most natural and comfortable.
6. Customize the Page-Swipe
- On a Mac, you may alter the swipe gesture used to flip between pages in programs like Safari.
- Click Trackpad, go down the left sidebar, and select the More Gestures option.
- Look for the option to Swipe between pages.
- Next to Swipe between pages, click the corresponding settings button or the dropdown menu.
- Choose the preferred gesture from the list or, if one is available, make a custom motion.
7. Customize the Gesture of Swiping Between Full-Screen Applications
- On a Mac, locate the Swipe between full-screen programs option to personalize the swipe gesture for navigating between apps.
- Select “Swipe between full-screen applications” from the dropdown menu.
- From the selection, choose the gesture you want to use.
8. Customize Mission Control Access Gesture
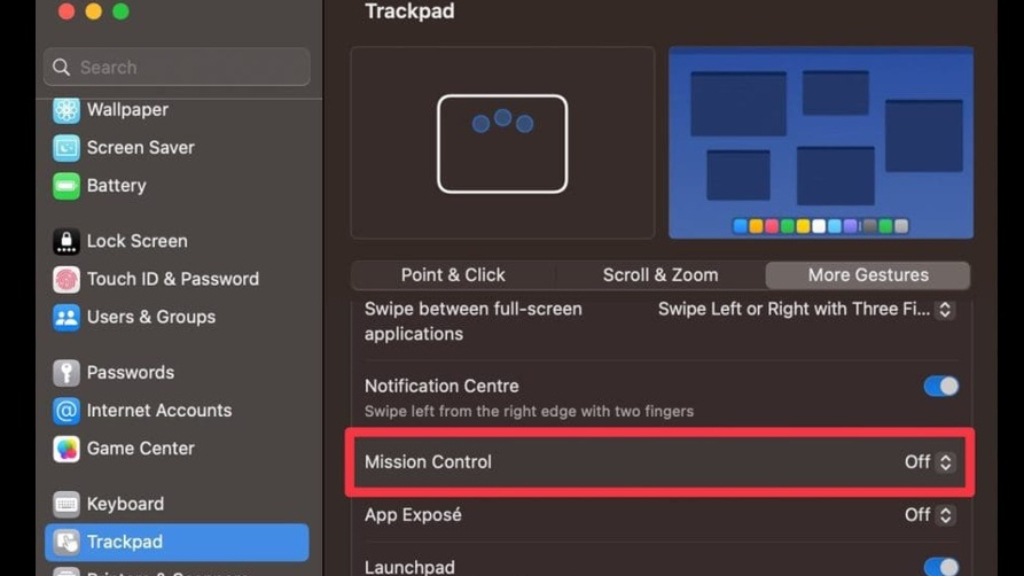
- You may take the following actions to personalize the gesture that opens Mission Control on a Mac, which shows a summary of all open windows and spaces:
- Click Trackpad to bring up the Mission Control option, then select the More Gestures tab.
- From the menu drop-down, choose Mission Control.
- A list of available gestures or actions for access to Mission Control will appear. From the list, pick the desired gesture.
You may access Mission Control by swiping upward with four fingers to see all open windows for all programs.
9. Customize App Exposé Gesture
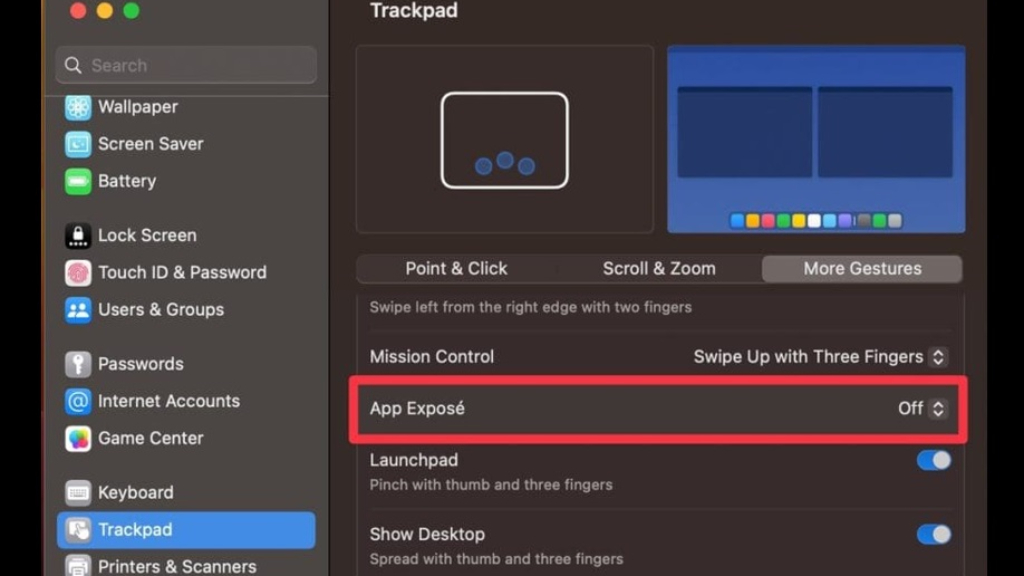
Look for the App Exposé option to modify the gesture that launches App Exposé on a Mac, which displays all open windows of the currently running program.
- From the drop-down option, click App Exposé.
- From the list, choose the desired gesture.
Alternatively, you may use the App Exposé feature to see all of the open windows related to the active program by swiping down with four fingers.


